Design your own Gamer-Pulse LED
07.02.2024

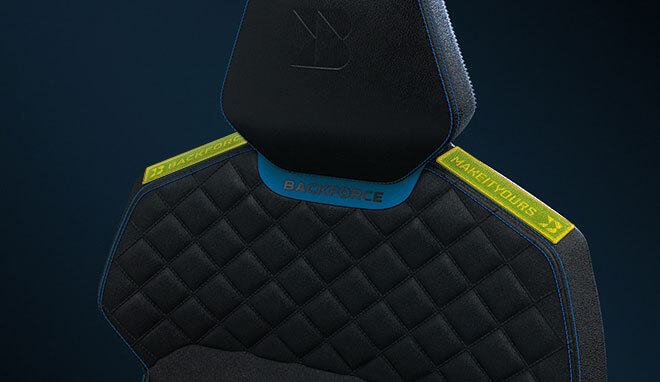
Our chairs are not only known for their ergonomics: There is one feature that outshines all others as an eye-catcher: the Gamer-Pulse LED. Dismissed by some as a mere gimmick, the brooch on the back of the chair contributes significantly to our recognizability. While in the standard versions the BACKFORCE logo lights up, the logos of numerous partners can be seen in the respective partner models.
But what if you want your own design to decorate the chair? Do you really have to become a partner first?
We'll show you how you can customize your Gamer-Pulse LED with very little effort!
What do you need?
To create your own design or logo for the Gamer-Pulse LED, you need the following:
Computer (or smartphone/tablet)
To use our template, you need a computer that can open and edit .docx files. Which device you use is up to you. Although the template was created for Microsoft Word, in our case, it could also be opened and edited on a Mac with Pages.
If you don't have a design yet, the computer is also useful for creating one. We'll tell you which programs you can use for this and how you should ideally create the document in a moment!
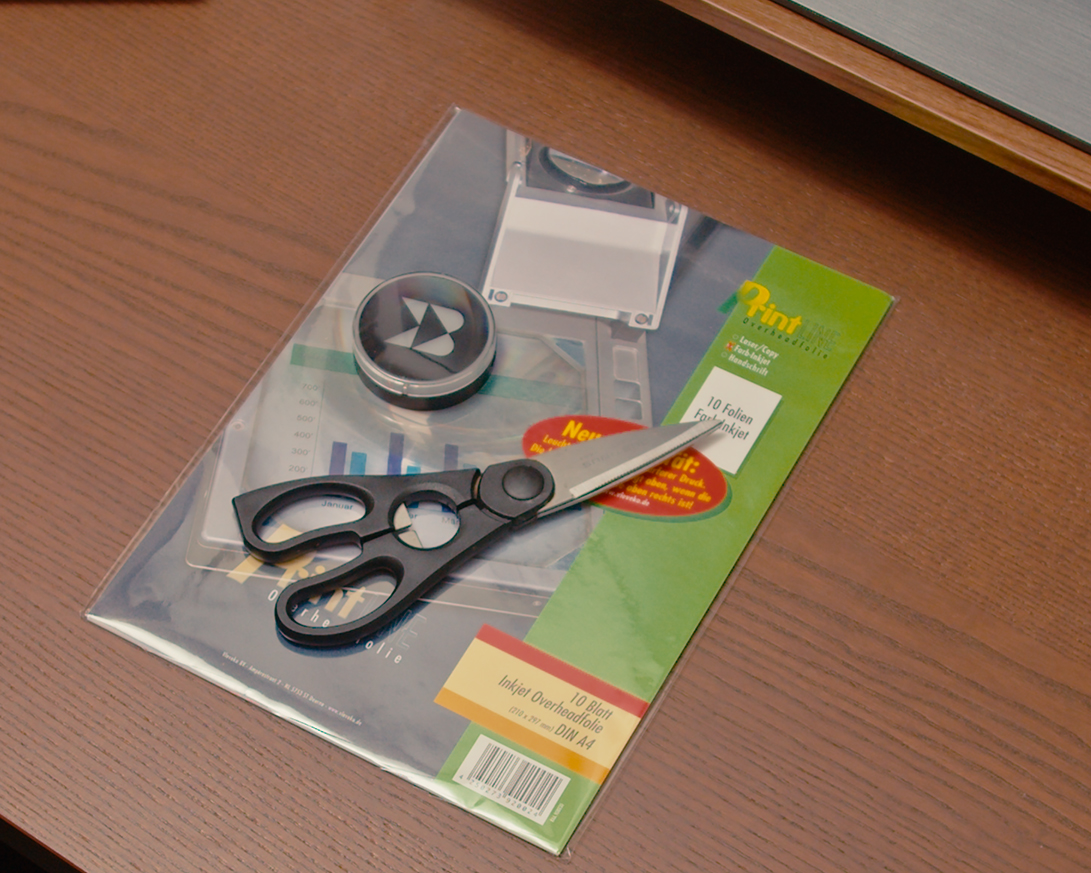
Printer & printable film
To print out your template, you will, of course, need a printer. You can use booth inkjet and laser printers. When buying printable film, make sure that it is suitable for your printer. Universal films that can be printed on by all types of printers are also available - but these are usually more expensive.
Our template
You can download our template from our website. You can find the link here.
Scissors
You will need scissors to cut out your template. In our case, ordinary kitchen scissors worked well.
Gamer-pulse LED
This point is kind of obvious - after all, the point is to create a design for this brooch. And it's true: The Gamer-Pulse LED is built into almost every BACKFORCE chair.
Owners of a BACKFORCE V (except for the Partner Editions) can also reorder the brooch in our online store.
Tips for designing your own logo
For private use, you can use any image you like. But, of course, it is even cooler if you use a logo that you have designed yourself.
You can use a variety of programs to create your design. There are two different kinds of programs: pixel-based and vector-based. The advantage of vector programs is that you can scale your design as you wish. This is because the created graphic consists of geometric shapes and curves, not individual pixels.
Pixel-based programs include, among others:
- Adobe Photoshop (paid, monthly subscription)
- Affinity Photo (paid, one-time purchase)
- Paint (included in Windows)
- Gimp (free open source software)
Vector-based programs include, among others:
- Adobe Illustrator (paid, monthly subscription)
- Affinity Designer (paid, one-time purchase)
- Inkscape (free open source software)
Which software you use is up to you. If you have had no previous experience with these programs, we recommend trying out one of the free alternatives first.
You can find numerous tutorials on the Internet (e.g., YouTube) that will help you get started with these programs.
To get the best results, we recommend the following settings for the document:
- Color mode: CMYK
- Width: 5.42 cm
- Height: 5.42 cm
- Resolution: 300 dpi
Editing the template
Once you have finished your design, all you have to do is insert it into the template. How to do this is described in the template. If you wish, you can print up to six designs on one sheet.
Printing
Before we start printing, we must first insert the printable film. Make sure that the film is inserted the right way around. With most films for inkjet printers, only one side can be printed on. This is usually roughened or adhesive. The packaging often states how the top side is marked. In our case, the top side is facing upwards when the cut corner is at the top right.
Most films for laser printers, on the other hand, can be printed on both sides.
Important: Pay attention to how your printer feeds the paper. You may need to place the film face down in the tray so that the correct side is printed.
We also recommend removing any existing paper from the tray. As the top side of the film is often slightly adhesive, it can otherwise happen that the film and paper stick together.
It is best to leave the printed film to dry for a few minutes to prevent smudges.
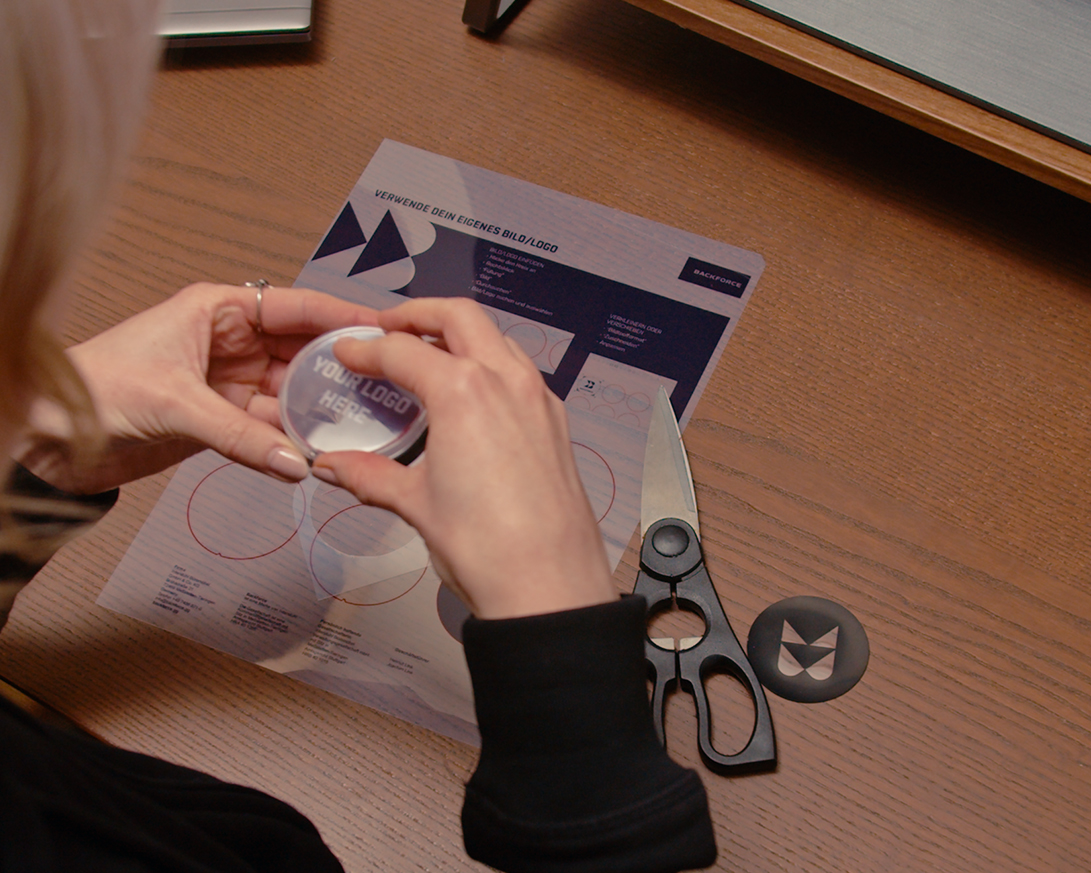
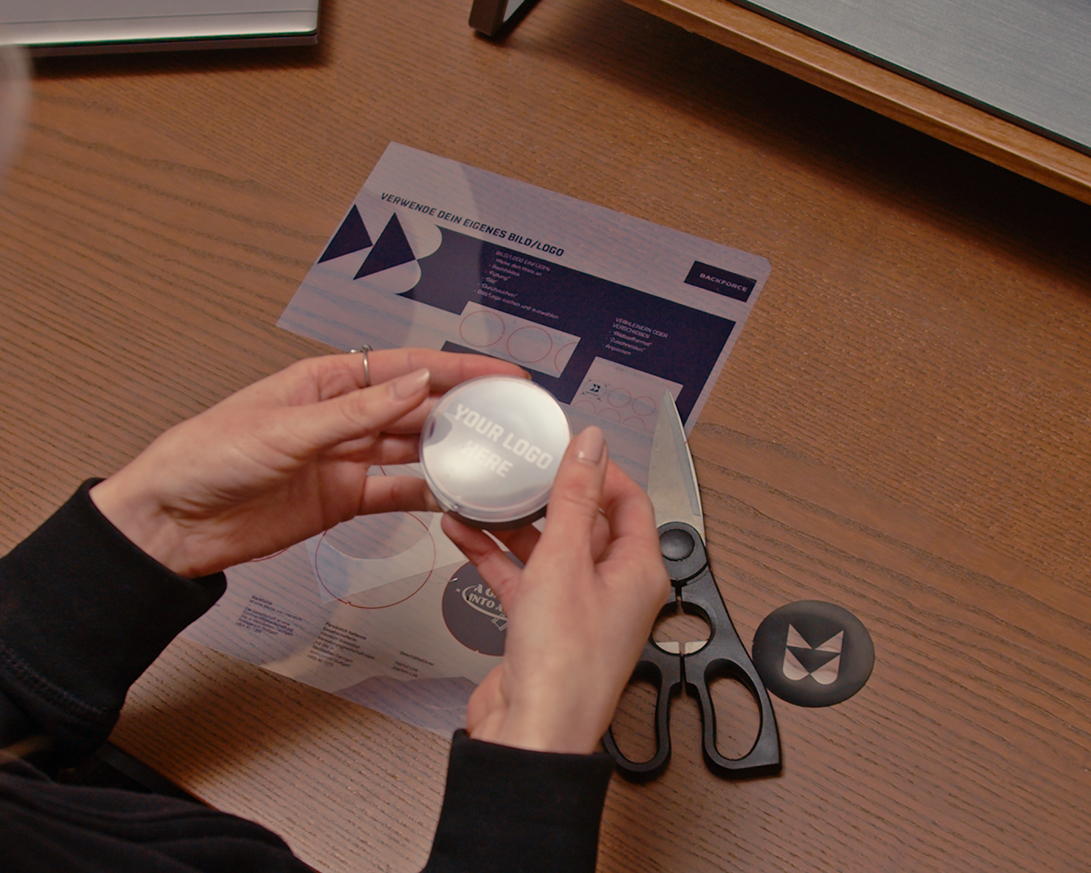
Cutting out your inlay
As soon as your film is dry, you can start cutting it out. To do this, cut carefully along the red marking.
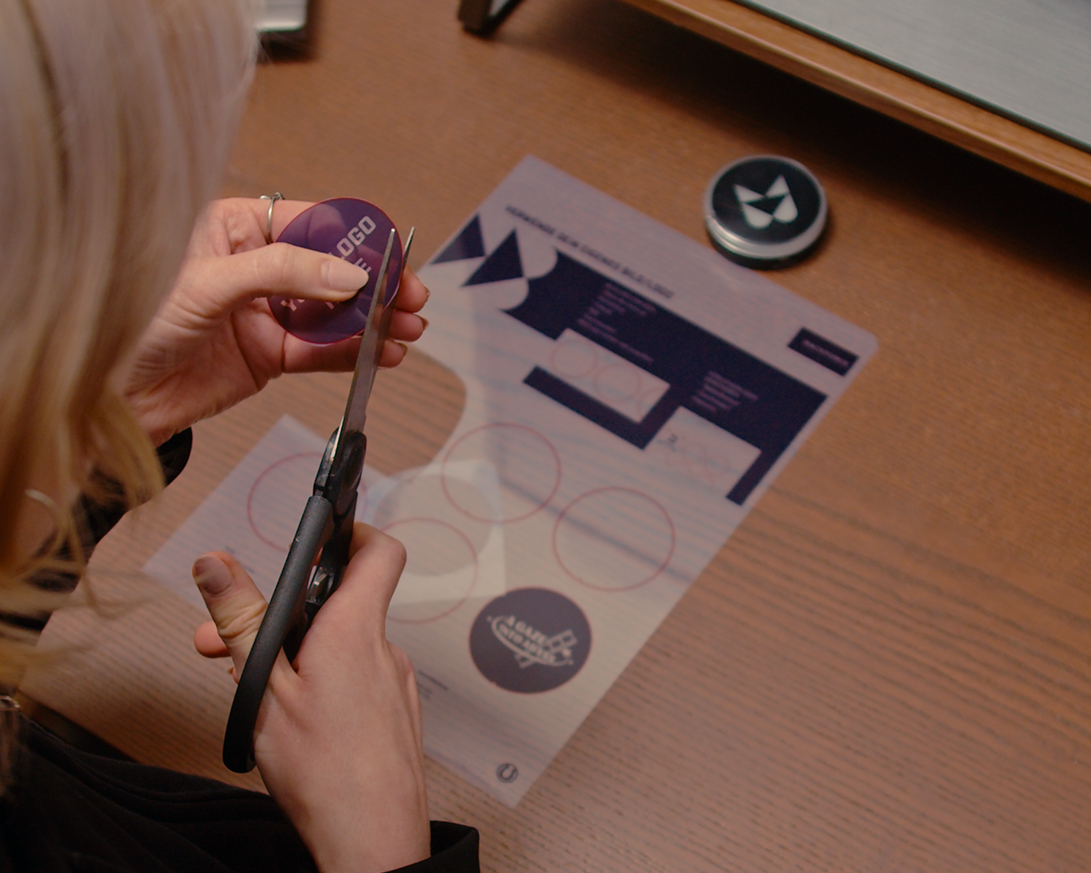
Important: This is not part of your design, but is only used as a guide. Also, don't forget to cut out the small notch on the underside.
When you are finished cutting, open the Gamer-Pulse LED. Simply peel off the previous film. Now insert your own foil. Align the notch with the corresponding mark in the brooch.
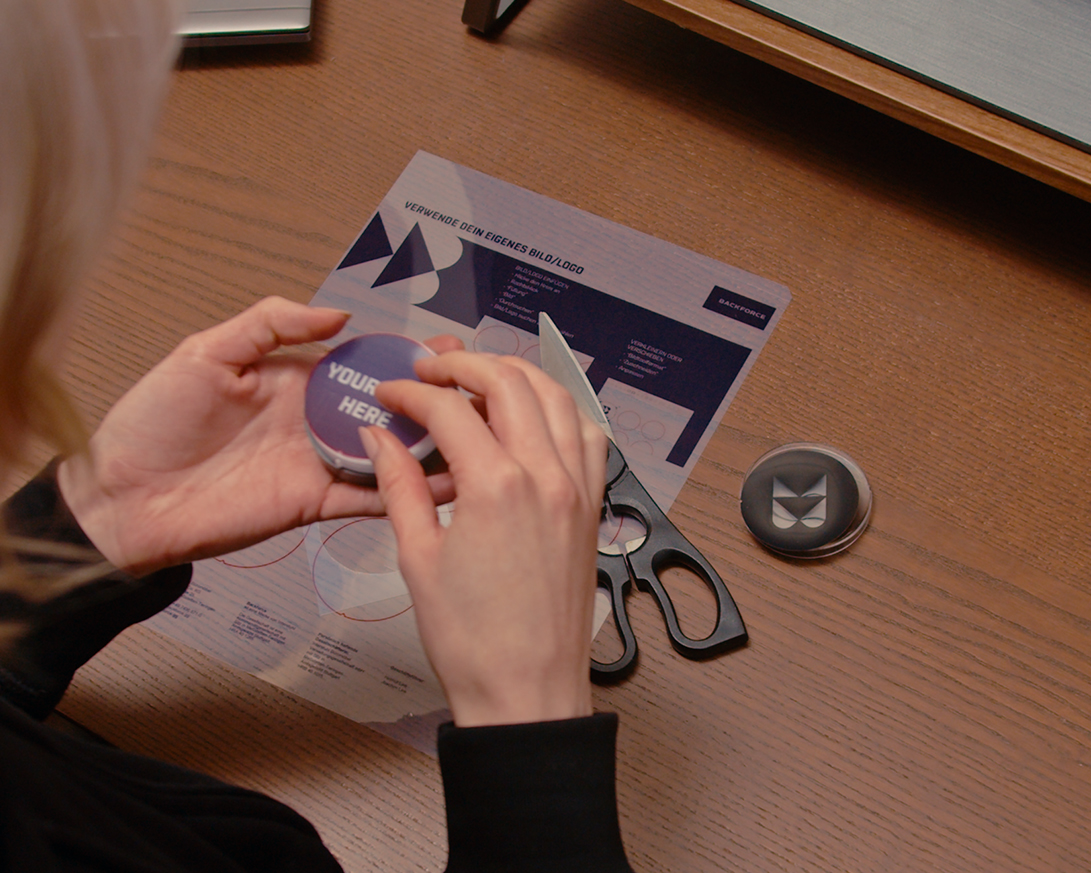
Then all you have to do is put the cover back on, and your own Gamer-Pulse LED with your personal design is ready!
Conclusion
A Gamer-Pulse LED with a personalized design is not just reserved for our partners. If you have a printer at home and the necessary time and patience, you can further customize your BACKFORCE chair with your own design in just a few steps.
By the way: Once you have created your own Gamer-Pulse LED, you are welcome to share it with others on social media. Tag us or send us a DM. We look forward to seeing how your brooches turned out!
back to overview